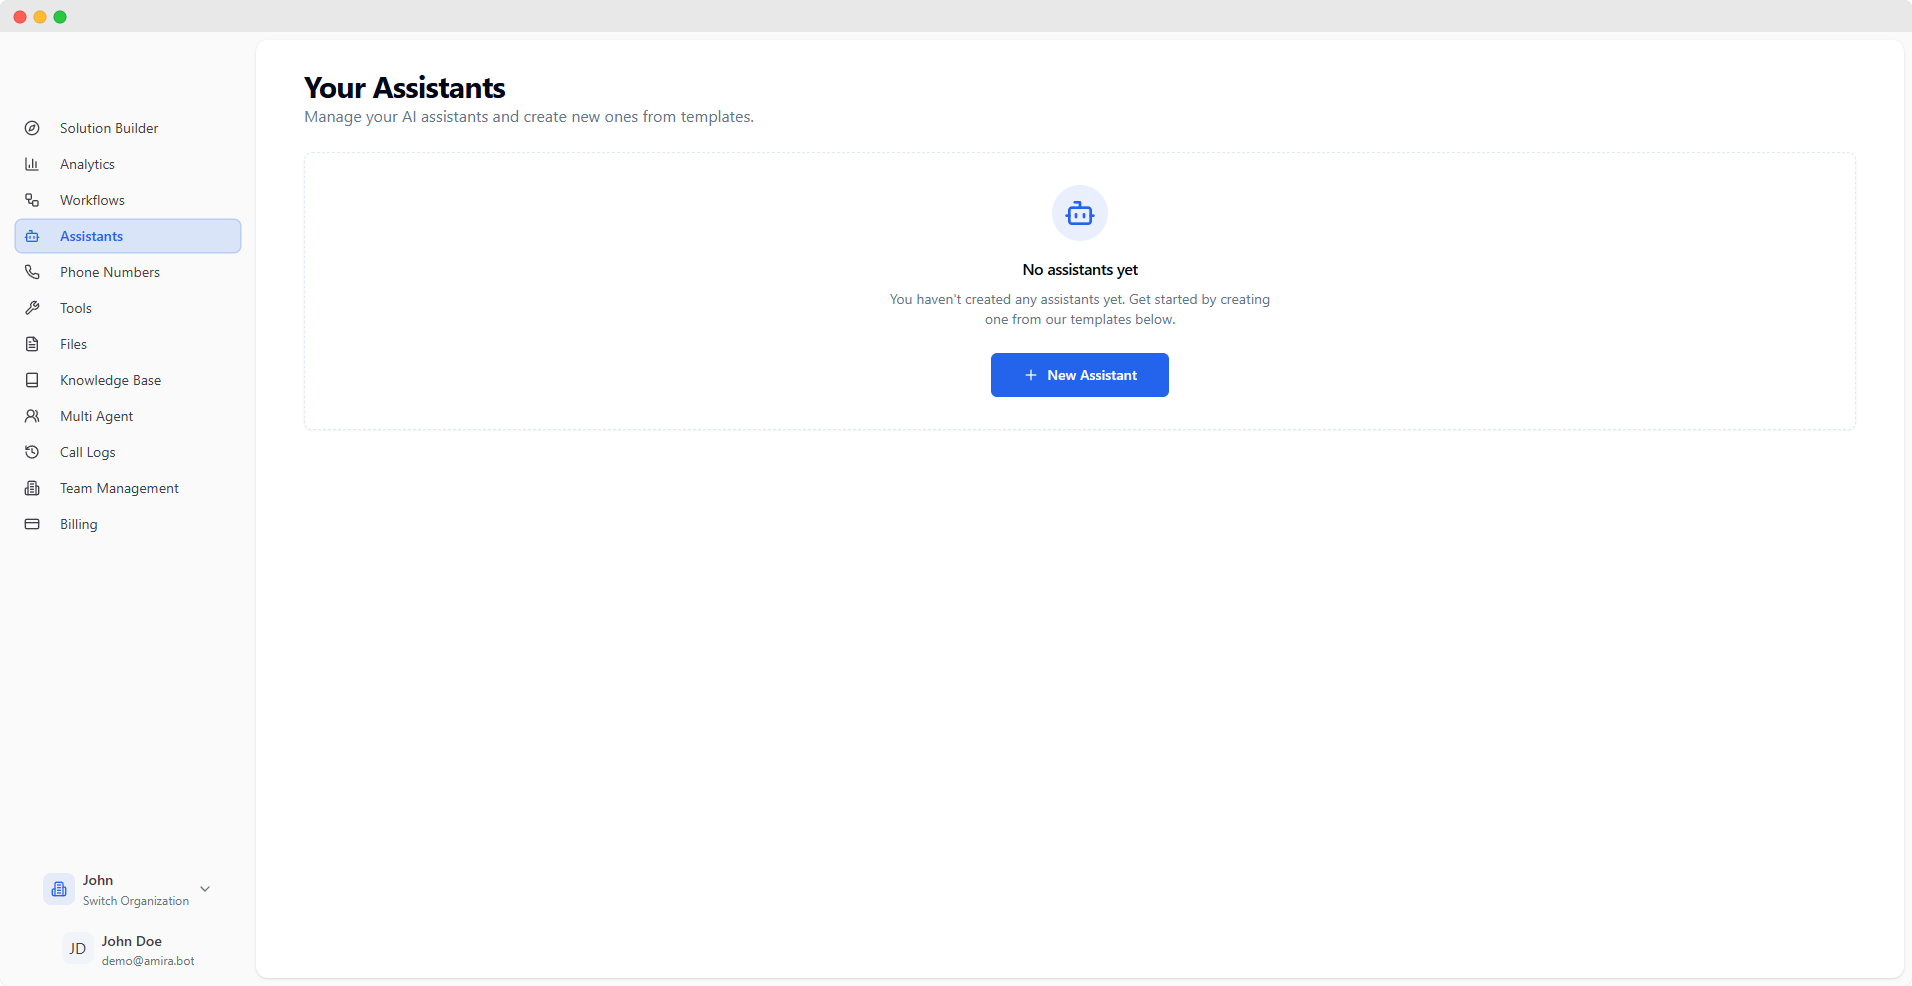
Main Interface
Create and manage multiple AI assistants, each with their own unique personality, voice, and behavior. Configure every aspect of your assistant through an intuitive interface divided into specialized configuration tabs.
Configuration Tabs
Behavior
Voice
Transcriber
Functions
Advanced
Analysis
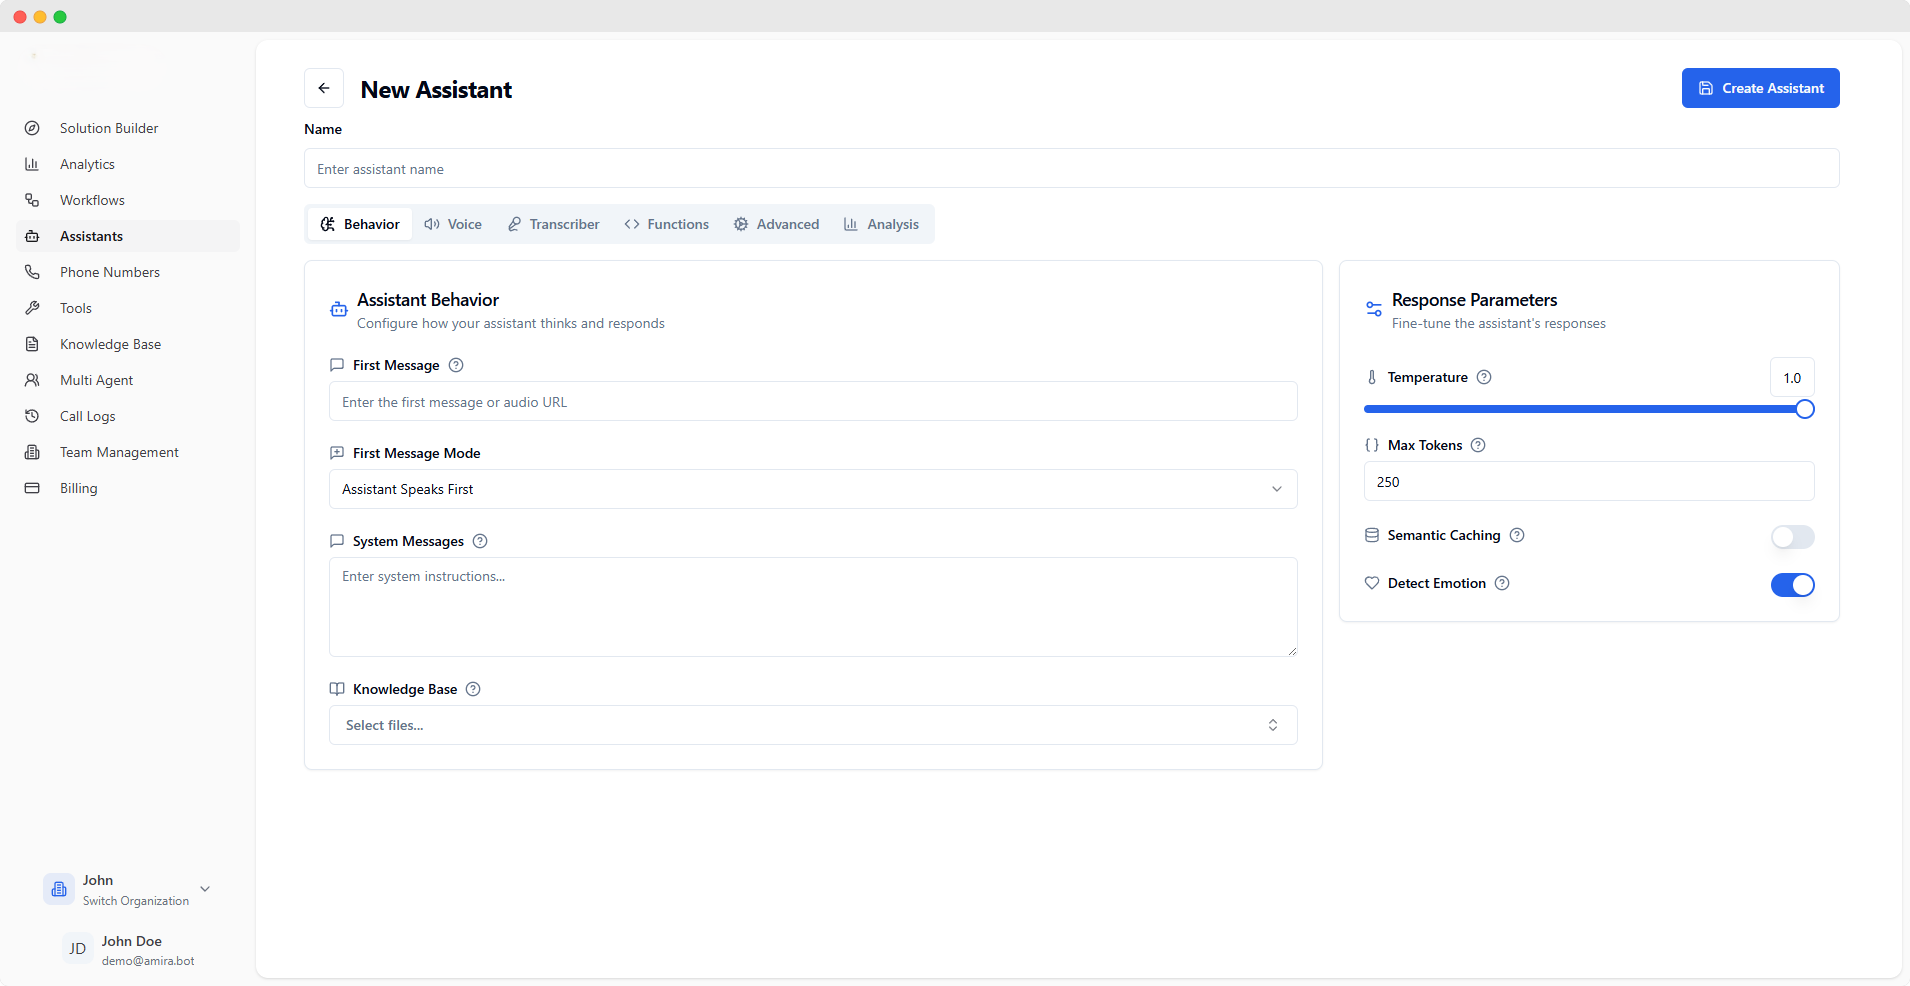
Initial Configuration
The opening message your assistant will use. You can enter text for a spoken message or provide an audio file URL (supports mp3, wav formats) for a pre-recorded greeting.
Choose how your assistant starts conversations:
- Assistant Waits for User: Remains silent until the user speaks first
- Assistant Speaks First: Begins with the specified first message
- Assistant Speaks First (Generated): Creates a contextual opening message automatically
Context & Knowledge
Define your assistant’s core behavior and personality. These instructions shape how the assistant understands and responds throughout conversations. Think of it as setting the ground rules for your assistant’s behavior.
Select documents your assistant can reference during conversations. This helps your assistant provide accurate, context-aware responses based on your specific content. Manage your documents in the Knowledge Base section. Response Configuration
Controls how creative your assistant’s responses are:
- Lower (0.0-0.3): More focused, consistent responses
- Medium (0.4-0.7): Balanced creativity
- Higher (0.8-1.0): More varied, creative responses
Limits the length of your assistant’s responses. A higher number allows for longer, more detailed responses, while a lower number keeps responses concise. One token is approximately 4 characters.
Advanced Options
Improves response speed by remembering answers to similar questions. When enabled, your assistant can quickly provide consistent answers to frequently asked questions.
Allows your assistant to recognize user emotions (like happiness, frustration, or confusion) and adjust responses accordingly for more empathetic interactions.
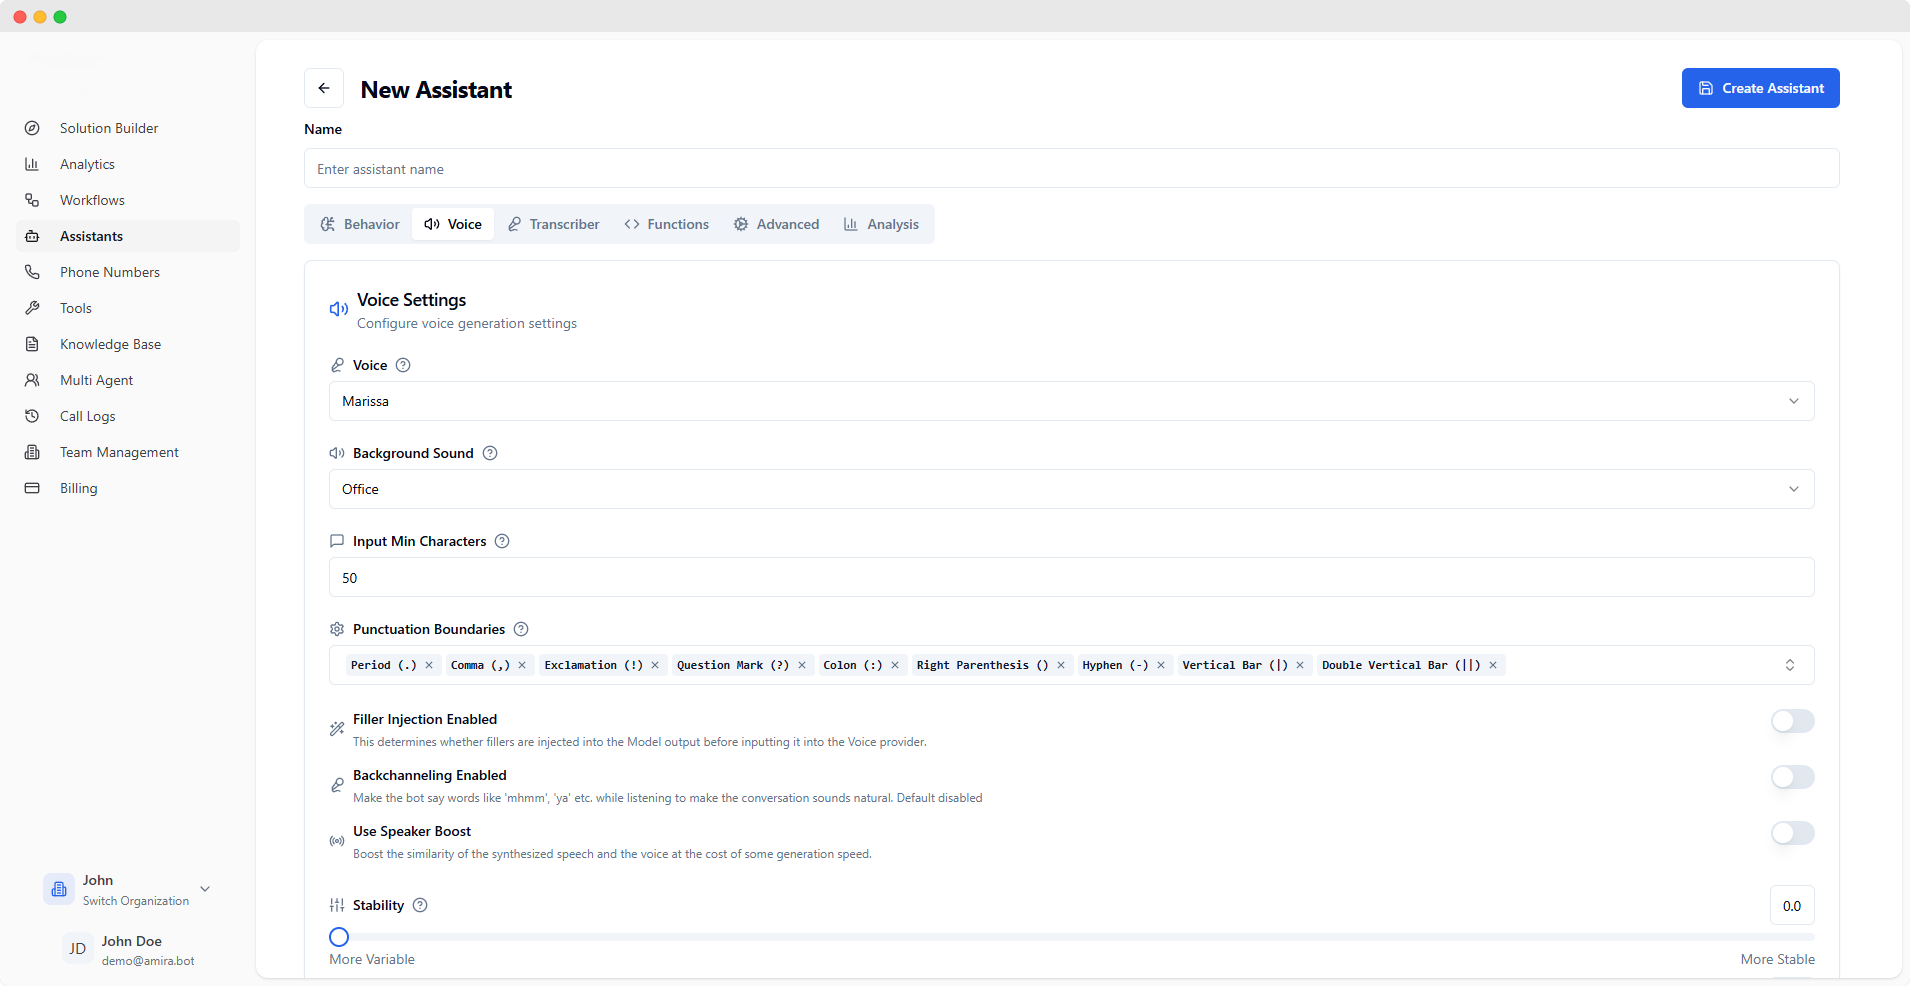
Basic Voice Settings
Choose the voice that best represents your assistant. Each voice has its own unique characteristics and personality, helping create a distinct identity for your assistant.
Add ambient sound to make conversations feel more natural:
- Office: Creates a professional office environment (default for phone calls)
- Off: No background sound (default for web calls)
Speech Processing
Sets the minimum text length before converting to speech. A smaller number means faster responses but potentially more choppy speech, while a larger number means smoother speech but slightly delayed responses.
Choose which punctuation marks will break speech into natural chunks:
- Period (.): Complete thought breaks
- Comma (,): Brief pauses
- Exclamation (!): Emotional breaks
- Question Mark (?): Question breaks
- Colon (:): Introductory breaks
- Right Parenthesis (): Aside breaks
- Hyphen (-): Soft breaks
- Vertical Bar (|): Custom breaks
- Double Vertical Bar (||): Strong custom breaks
Natural Conversation Features
Adds natural speech fillers (like “um”, “uh”) to make the assistant sound more human-like. This helps create more natural-sounding conversations by mimicking real speech patterns.
Enables subtle listener responses (like “mhmm”, “yeah”) while the user is speaking. This creates more engaging conversations by showing active listening, just like a real person would.
Voice Quality Settings
Enhances voice consistency and character at a slight speed cost. Enable this when voice quality is more important than generation speed.
Controls voice consistency:
- Lower (0.0-0.3): More natural, varied speech
- Medium (0.4-0.7): Balanced consistency
- Higher (0.8-1.0): Very consistent but might sound monotone
Tip: Use lower values for longer conversations to sound more natural.
Advanced Voice Settings
Balances speech clarity with voice matching:
- Lower: Prioritizes natural speech flow
- Higher: Focuses on matching the selected voice
Find the sweet spot that sounds best for your use case.
Adjusts voice personality strength:
- Lower: More neutral, faster generation
- Higher: Stronger personality, more expressive
Start low and increase if you want more character in the voice.
Balance between response speed and voice quality:
- Level 1: Highest quality, longer delays
- Level 2-3: Balanced performance
- Level 4: Fastest responses, might affect quality
Choose higher levels for real-time conversations, lower for pre-recorded messages.
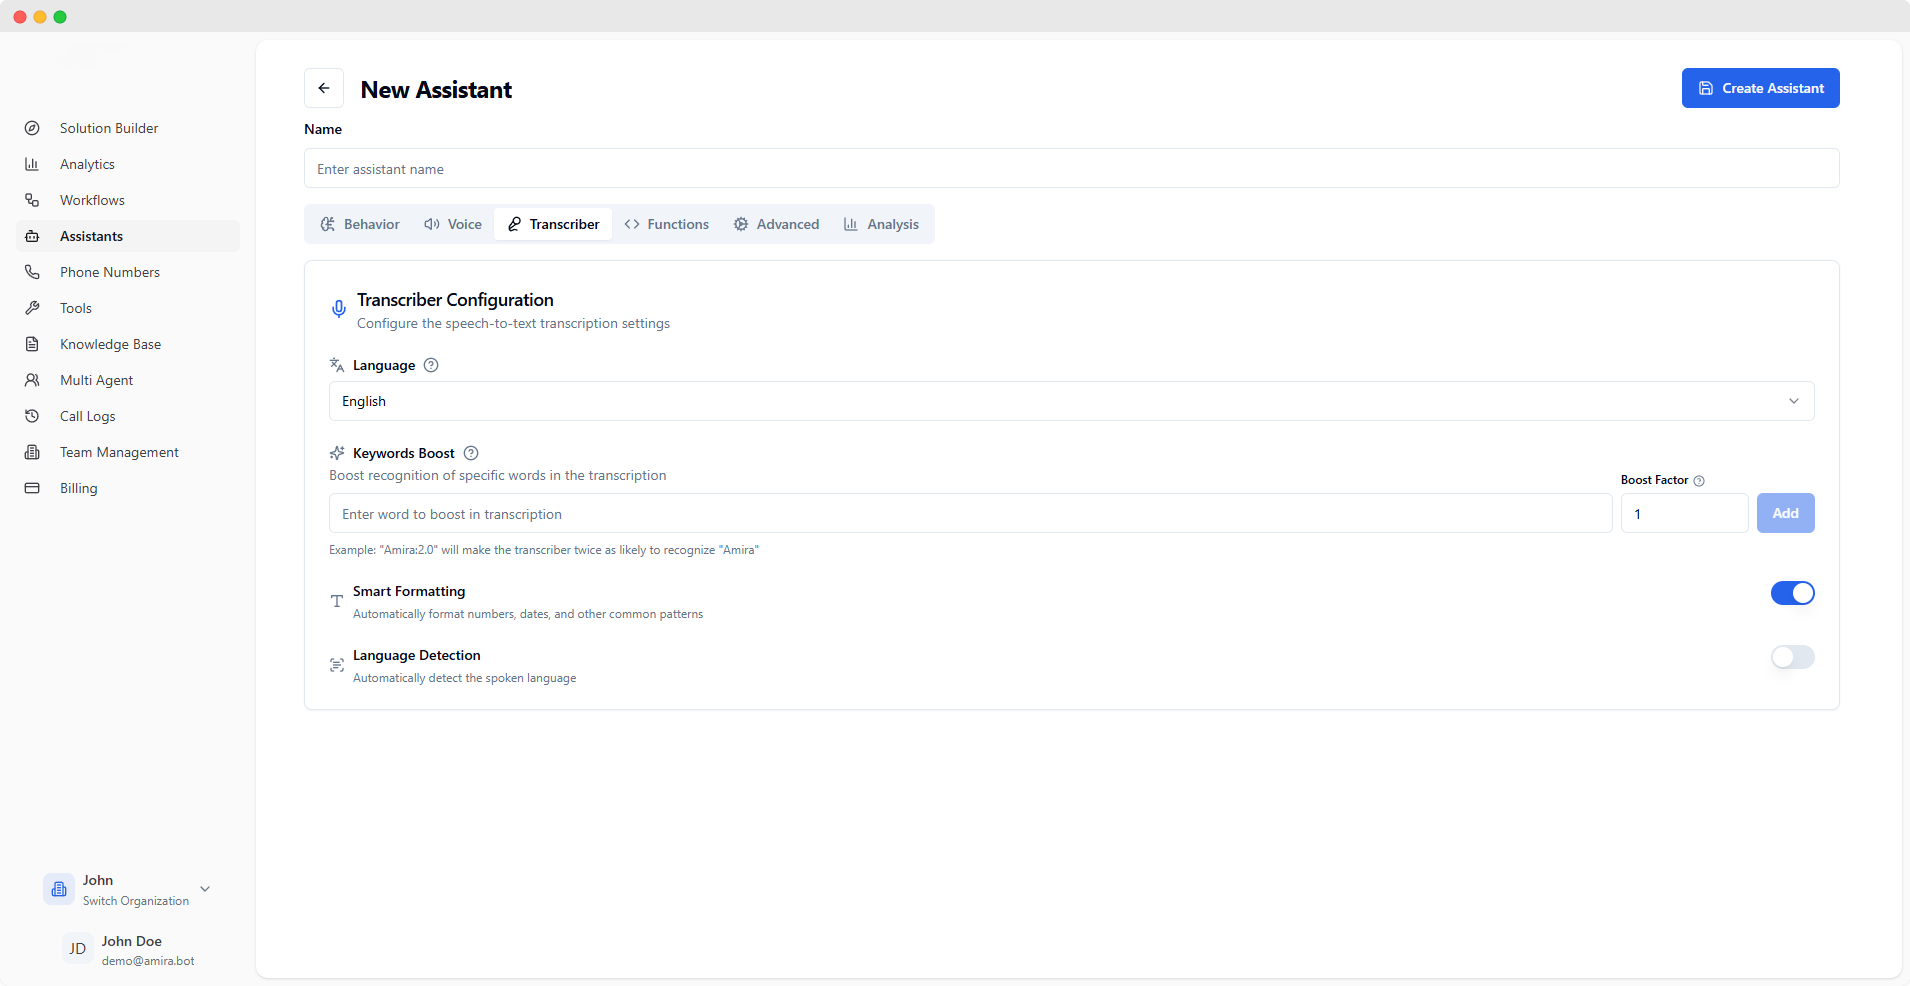
Basic Settings
Select the main language your users will speak in. This helps the transcriber accurately convert speech to text by focusing on the specific sounds and patterns of your chosen language.
Keyword Recognition
Improve recognition accuracy for specific words that matter to your business. Add important terms with their boost factors to help the transcriber catch them correctly.How to use Keywords Boost effectively:
- Enter a word (e.g., “VoiceBot”)
- Set a boost factor (1.0 - 20.0)
- Click Add to include it in your list
Examples:
- Company name: “VoiceBot:2.0”
- Product name: “ServicePro:1.5”
- Technical term: “API:1.8”
- Use for important, uncommon words (names, technical terms, brands)
- Start with lower boost factors (1.2 - 2.0)
- Avoid boosting common words
- Limit to 100 most important keywords
Boost Factor Guide:
- 1.0: Normal recognition
- 1.5: Moderate boost
- 2.0: Strong boost
- 3.0+: Very strong boost (use sparingly)
Intelligent Features
Automatically formats common patterns in the transcript:
- Numbers (“twenty three” → “23”)
- Dates (“january fifth” → “January 5th”)
- Times (“three thirty pm” → “3:30 PM”)
- Currency (“five dollars” → “$5”)
Enable this for cleaner, more readable transcripts.
Automatically identifies the spoken language during conversations. Useful for:
- Multi-language support
- International customers
- Detecting language switches mid-conversation
Note: Keep disabled if you only use one language to improve accuracy.
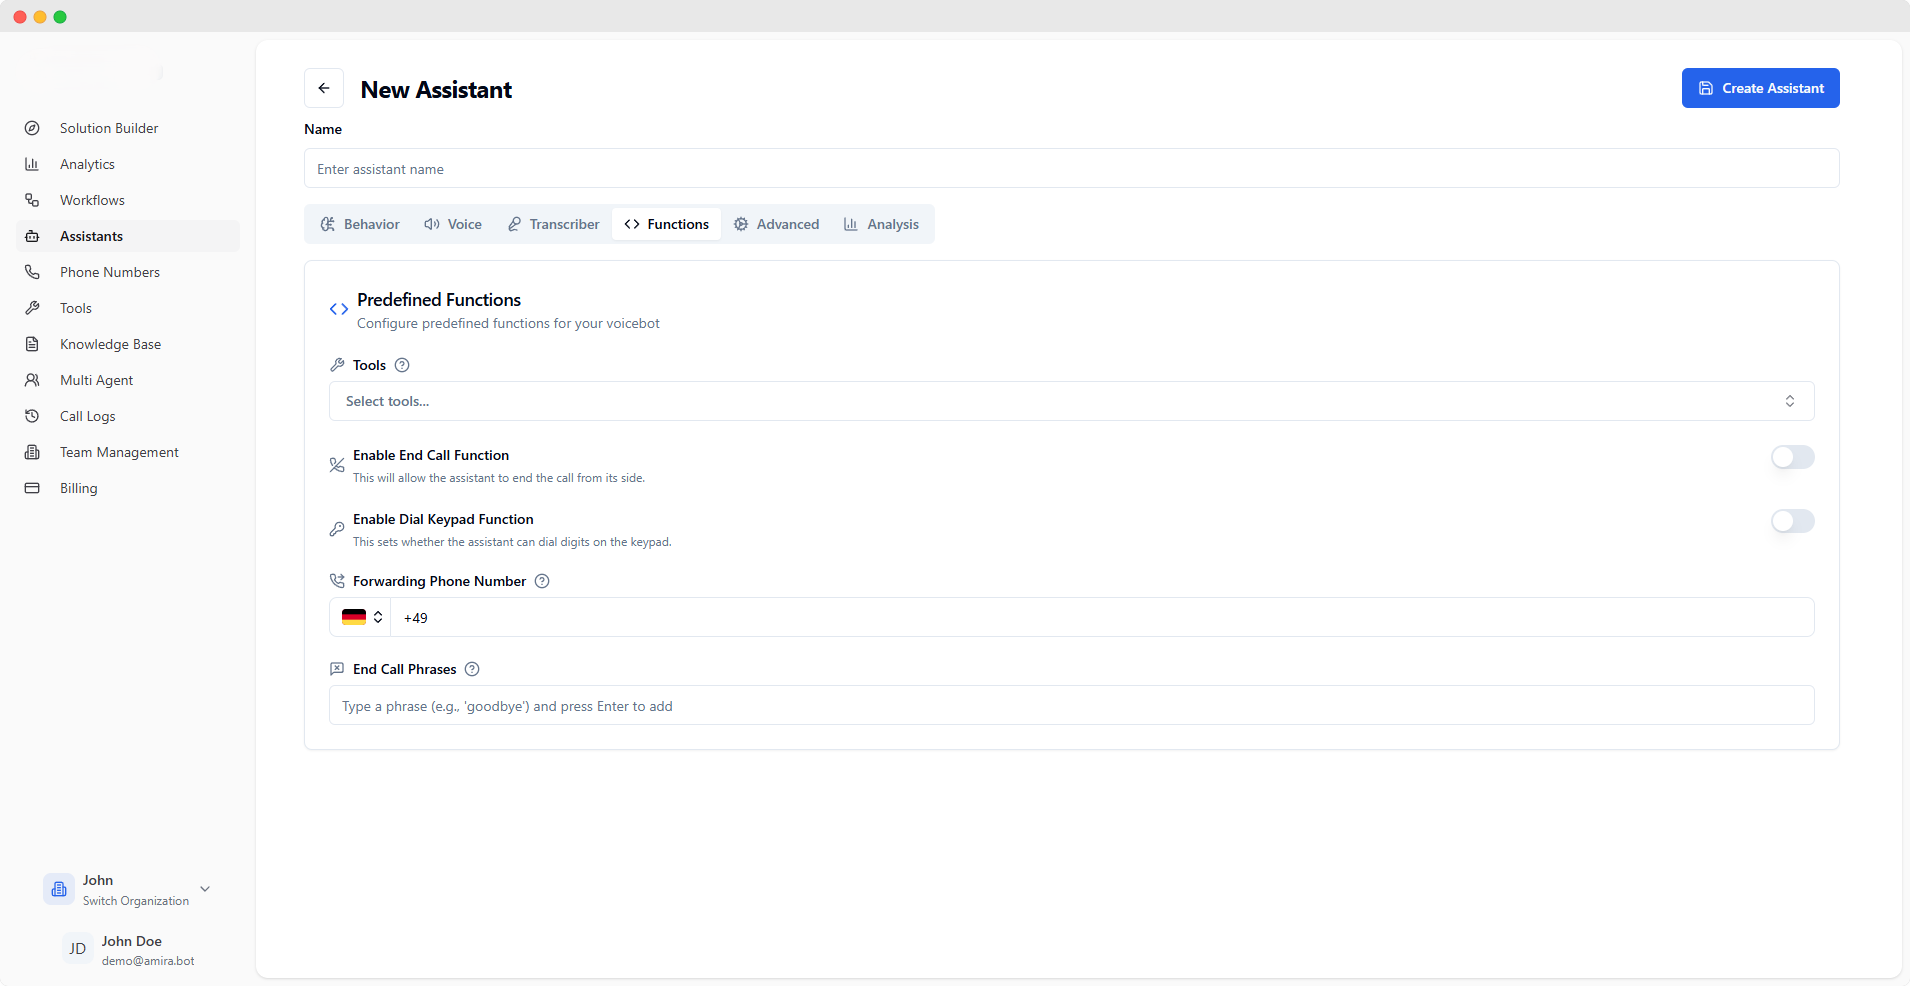
Connect your assistant with powerful tools to perform actions during calls. Choose from pre-built tools or integrate your own:
- Built-in tools from the Tools page
- Custom backend integrations
- Workflow automations
Tip: Start with essential tools and add more as needed to avoid overwhelming your assistant. Call Control
Allows your assistant to professionally end calls when appropriate:
- After completing the main task
- When requested by the user
- When further assistance isn’t needed
Enable this for more natural conversation endings.
Gives your assistant the ability to input numbers during calls:
- Entering verification codes
- Navigating phone menus
- Inputting reference numbers
Useful for integration with other phone systems.
Call Routing
Set up a fallback number for transferring calls when needed:
- Human agent escalation
- Specialized department transfer
- Emergency contact routing
Format: Include country code (e.g., +1 for US numbers) Call Termination
Define phrases that will trigger the assistant to end the call naturally. Add common expressions users might say to conclude their conversation.Example phrases:
- “goodbye”
- “end call”
- “hang up”
- “that’s all”
- “we’re done”
- “thank you, bye”
Best Practices:
- Include variations of common endings
- Keep phrases short and natural
- Consider your user base’s language preferences
- Add both formal and informal phrases
How to manage:
- Press Enter after each phrase to add
- Press Backspace when empty to remove the last phrase
- Keep phrases simple and clear
Configure these functions thoughtfully to ensure your assistant can handle calls professionally while maintaining a natural conversation flow.
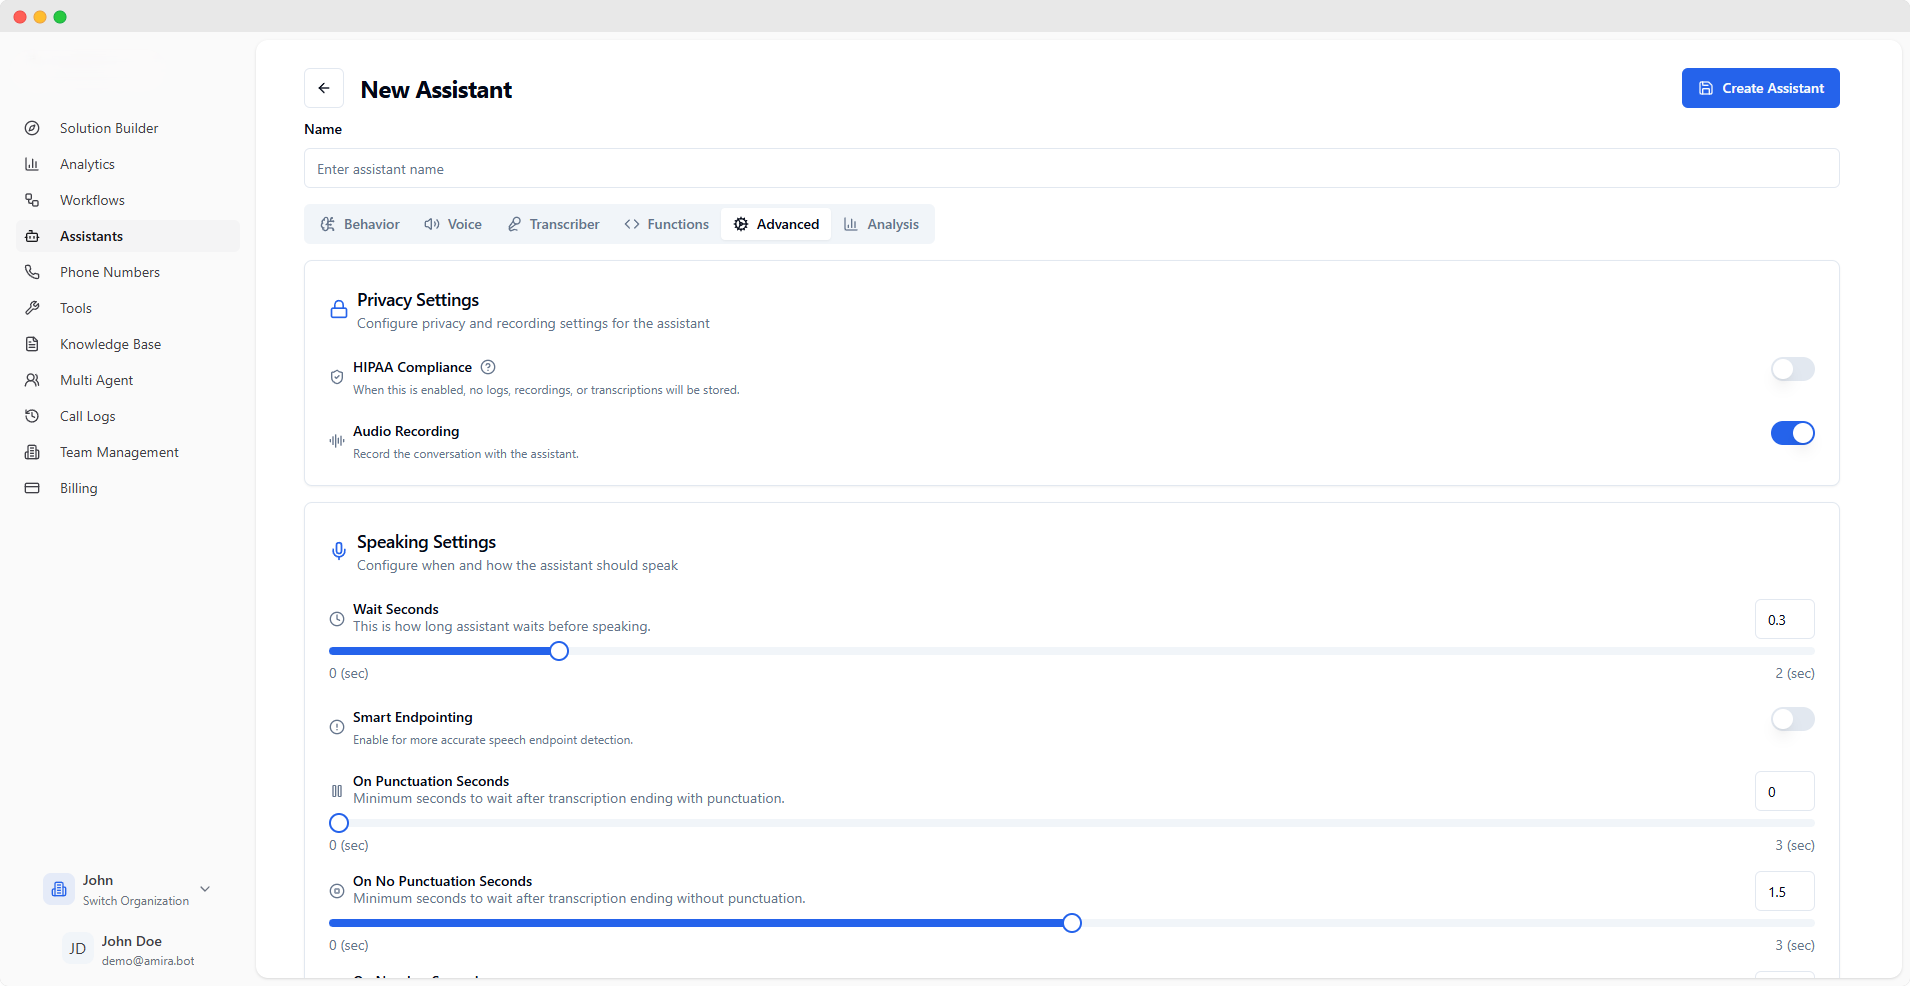
Privacy Settings
Enables healthcare privacy compliance mode:
- No storage of logs or recordings
- Automatic disabling of audio recording
- Organization-wide enforcement
Essential for healthcare-related applications.
Store conversation recordings for:
- Quality assurance
- Training purposes
- Compliance requirements
Note: Automatically disabled when HIPAA Compliance is on.
Speaking Behavior
Fine-tune how long your assistant pauses before responding:
- 0 seconds: Immediate responses
- 1 second: Natural conversation pace
- 2 seconds: More contemplative style
Tip: Shorter times feel more responsive, longer times feel more natural.
Enable AI-powered conversation timing:
- Automatically detects when to respond
- Adapts to user’s speaking style
- Handles pauses intelligently
Recommended for most use cases.
Note: When enabled, the manual timing controls below will be hidden as they are automatically managed. Wait time after complete sentences:
- 0 sec: Quick responses
- 1-2 sec: Natural pauses
- 3 sec: Extended reflection
Note: Only available when Smart Endpointing is disabled.
Wait time after incomplete thoughts:
- 0-1 sec: Quick interjections
- 1.5 sec: Default pause
- 2-3 sec: Patient waiting
Note: Only available when Smart Endpointing is disabled.
Wait time after numerical input:
- 0-0.3 sec: Quick confirmation
- 0.5 sec: Standard pause
- 1+ sec: Extended verification
Note: Only available when Smart Endpointing is disabled.
Interruption Handling
Words needed to interrupt assistant:
- 0: Any sound interrupts
- 3-5: Short phrases
- 7-10: Complete thoughts
Speaking duration to trigger interruption:
- 0 sec: Instant response
- 0.2-0.3 sec: Quick acknowledgment
- 0.5 sec: Confirmed speech
Pause after being interrupted:
- 0-2 sec: Quick recovery
- 3-5 sec: Polite pause
- 6-10 sec: Extended waiting
Call Duration Controls
Automatic call end after silence:
- 10-30 sec: Quick timeout
- 60-120 sec: Standard wait
- 300-600 sec: Extended patience
Best Practice: Set based on your use case.
Longest allowed call duration:
- 300 sec (5 min): Quick interactions
- 1800 sec (30 min): Standard calls
- 43200 sec (12 hrs): Extended sessions
Tip: Set based on typical conversation length.
Server Integration
Endpoint for receiving server messages:
- Must be a secure HTTPS endpoint
- Handles real-time updates
- Processes call events
Choose which events to send to your server:
- End of Call Report: Final call summary
- Function Call: Tool usage events
- Conversation Update: Dialog progress
- Model Output: AI responses
- Speech/Transcript: Voice-to-text
- Tool Calls: Integration activities
Select only the events you need to process.
Call Messages
Custom message when detecting voicemail:
Example: “I notice this is a voicemail. I’ll end the call now and try again later.”
Polite message before ending calls:
Example: “Thank you for your time. Have a great day!”
Idle Handling
Select messages to use during silence:
- Engagement prompts
- Helpful suggestions
- Friendly reminders
Tip: Choose messages matching your assistant’s personality.
Limit repeated prompts:
- 1-2: Minimal prompting
- 3-5: Standard engagement
- 6-10: Persistent assistance
Seconds before showing idle message:
- 5-6 sec: Quick engagement
- 7-8 sec: Natural timing
- 9-10 sec: Patient waiting
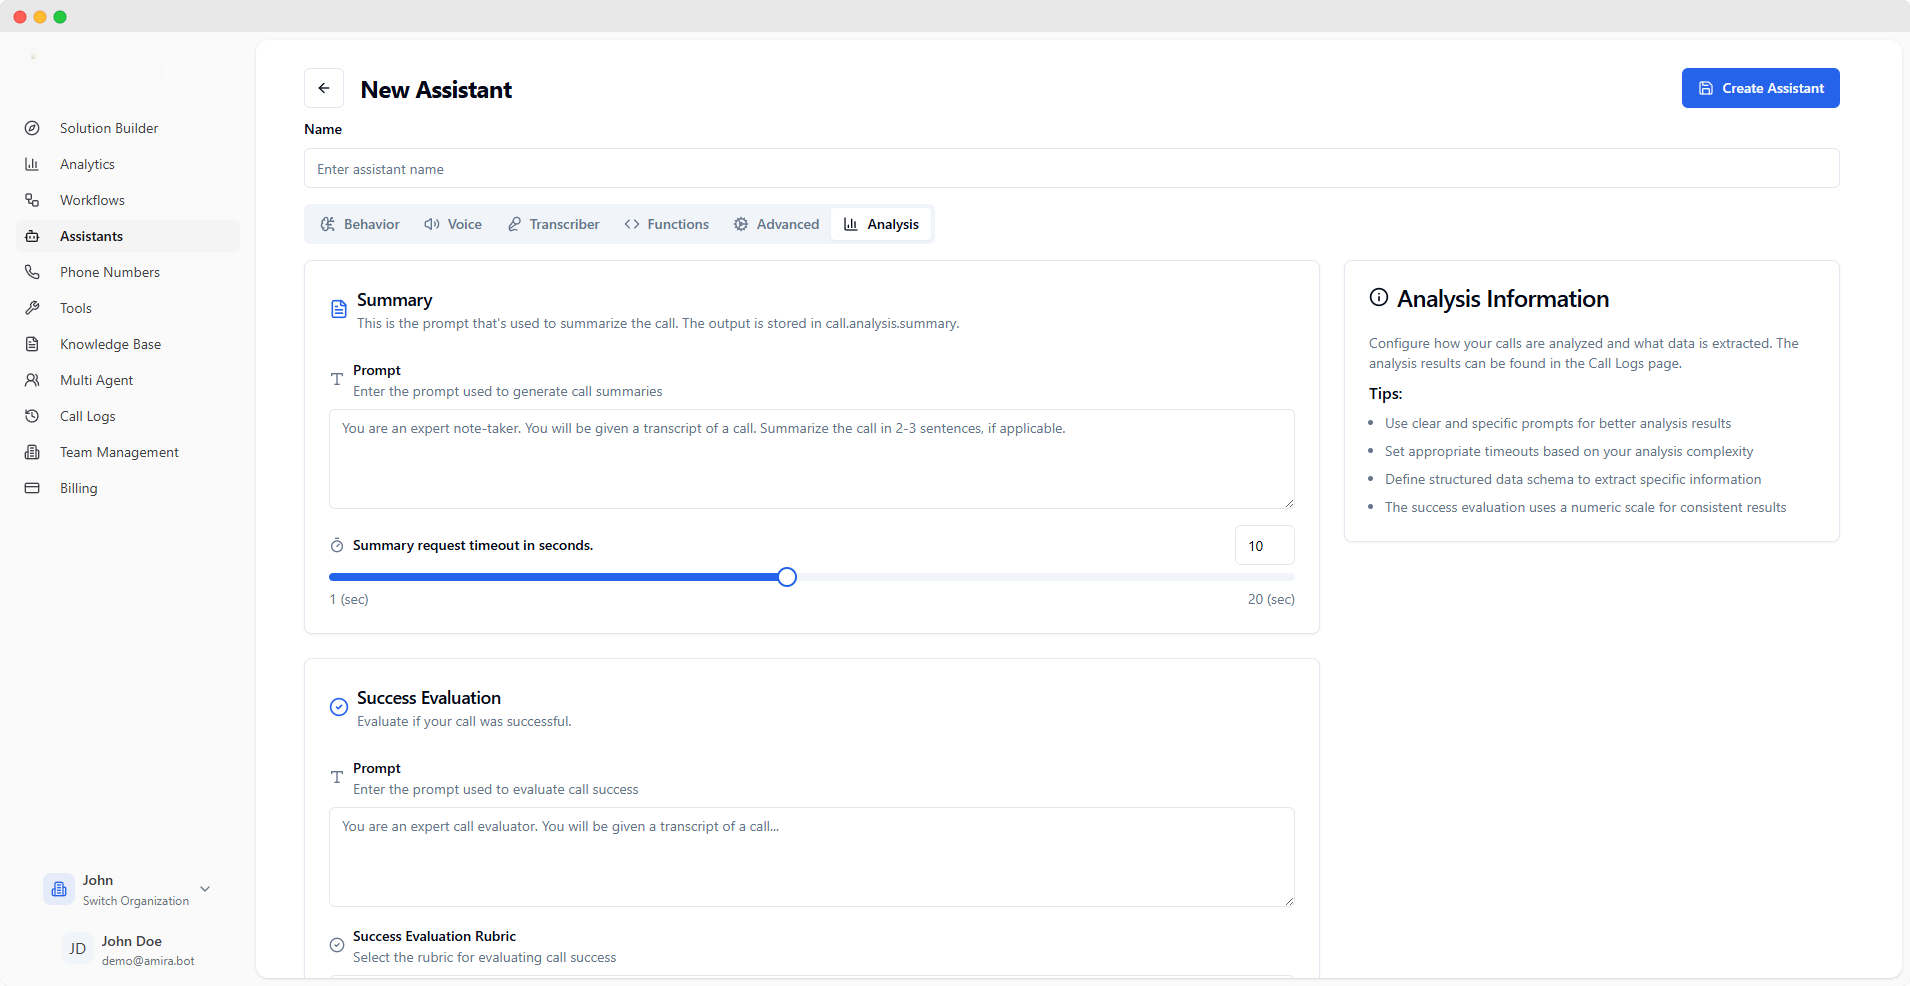
Call Summary
Configure how your assistant summarizes each call. The summary appears in call.analysis.summary.Sample Format:Summarize the key points, decisions, and action items from the call in 2-3 sentences.
Focus on customer requirements, solutions provided, and next steps agreed upon.
- Keep instructions clear and concise
- Focus on key information
- Specify desired length and format
- Include important details to capture
Maximum time allowed for summary generation:
- Default: 10 seconds
- Range: 1-20 seconds
Note: Request will timeout if processing exceeds this duration. Success Evaluation
Define how your assistant evaluates call success. Customize the prompt to match your quality criteria.Recommended Structure:Analyze the call for:
1. Customer satisfaction level
2. Problem resolution completeness
3. Protocol adherence and professionalism
- Define clear success criteria
- Include specific metrics
- Consider customer satisfaction
- Account for business goals
Choose how to measure call success:Available Scales:
-
Numeric Scale: Rate calls from 1-10
Example: “7/10 - Good customer service”
-
Descriptive Scale: Excellent → Poor
Example: “Good - Resolved issue efficiently”
-
Checklist: Yes/No criteria list
Example: “Greeting ✓, Solution ✓, Follow-up ✗”
-
Matrix: Multi-criteria evaluation
Example: “Service: High, Knowledge: Medium”
-
Percentage Scale: 0-100%
Example: “85% successful interaction”
-
Likert Scale: Strongly Agree → Disagree
Example: “Agree - Met customer needs”
-
Automatic Rubric: AI-generated criteria
Example: “Communication: 8/10, Resolution: 9/10”
-
Pass/Fail: Simple yes/no outcome
Example: “true - Call objectives met”
Maximum time allowed for success evaluation:
- Default: 10 seconds
- Range: 1-20 seconds
Note: Evaluation will stop if processing exceeds this duration. Configure how to extract specific data points from calls.Prompt Guidelines:Extract the following information:
- Customer contact details
- Product specifications discussed
- Service requirements identified
- Action items and deadlines
- List specific fields to extract
- Define expected formats
- Include validation rules
- Specify required vs optional data
Maximum time allowed for data extraction:
- Default: 10 seconds
- Range: 1-20 seconds
Note: Extraction will terminate if processing exceeds this duration. Schema Properties
Define the structure of data to extract from calls.Property Configuration:
- Click “Add Property” for each data point
- Fill in the details:
- Name: Unique identifier (e.g., “customerName”)
- Type: Data format
string: Text (names, descriptions)number: Numerical valuesboolean: True/False valuesarray: Lists of itemsobject: Nested data structures
- Required: Check if mandatory
- Description: Explain the property
Example Schema:{
"customerName": {
"type": "string",
"required": true,
"description": "Full name of the customer"
},
"satisfactionScore": {
"type": "number",
"required": false,
"description": "Rating from 1-10"
}
}
- Use clear, descriptive names
- Add helpful descriptions
- Mark essential fields as required
- Choose appropriate data types
Changes to assistant configurations take effect immediately for new conversations.